
Disclosure: Our experts test apps for security before recommending them. If you buy through our links, we may earn a commission. See how it works.
DNS (Domain Name System) helps you reach the correct website on the internet. People change their DNS settings on devices like the FireStick for various reasons.
One common motive is to achieve faster internet speeds. Changing DNS settings also sometimes helps bypass geographical restrictions on content.
How to Change DNS on FireStick Network
Changing DNS on FireStick is not as tricky as it may sound. You can complete the process in a breeze by following the steps below:
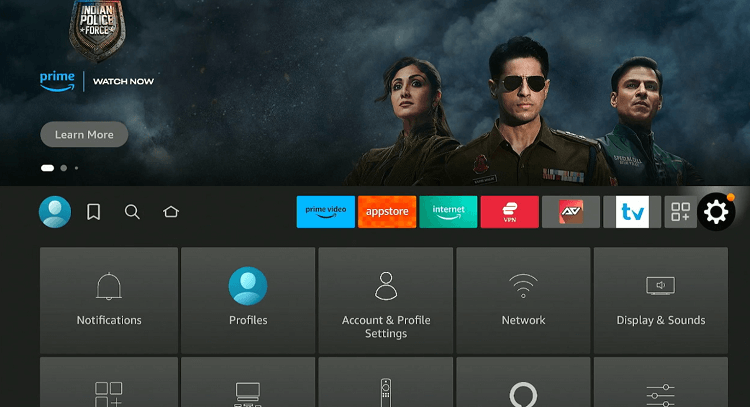
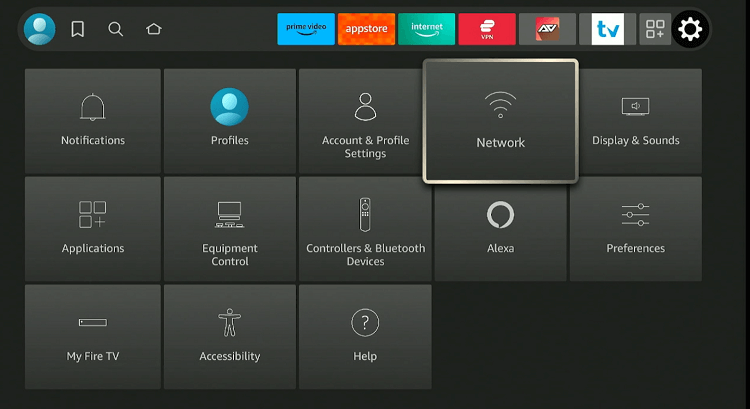
Step 1: Choose “Settings” from the top right corner of the home screen.
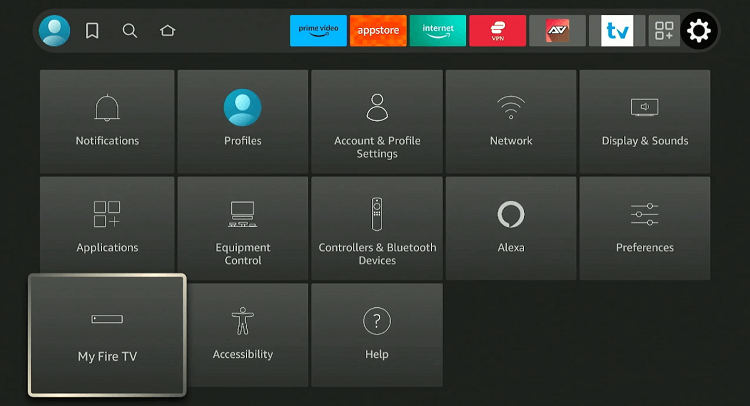
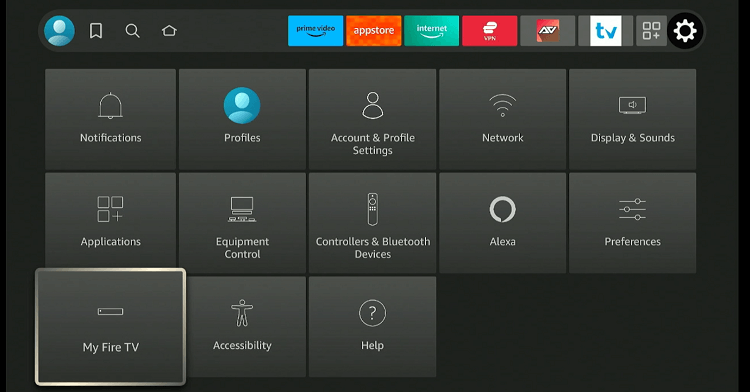
Step 2: Navigate to “My Fire TV”.
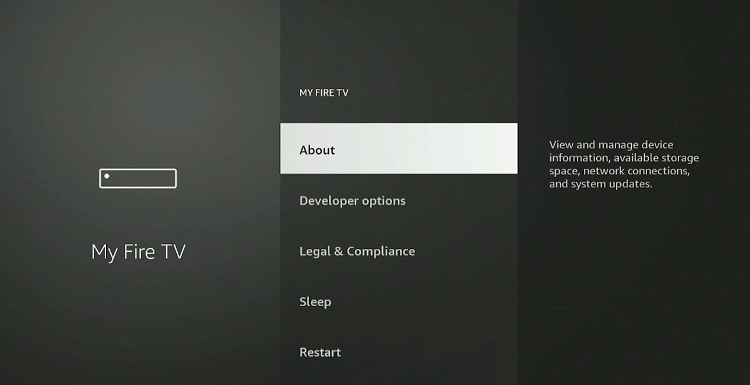
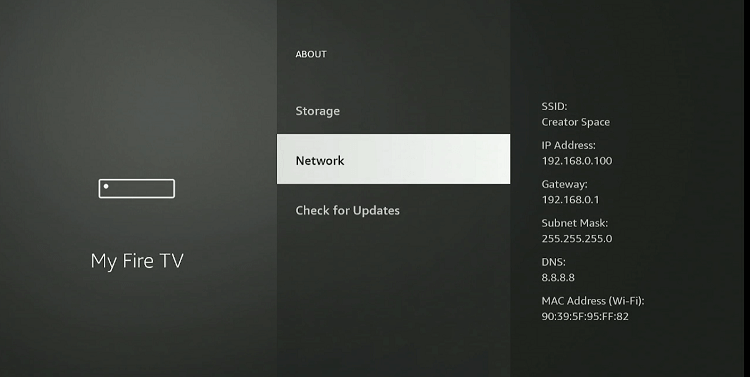
Step 3: Click “About”.
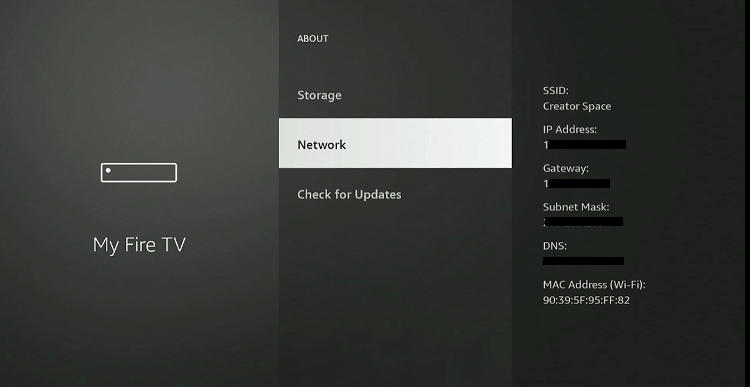
Step 4: Navigate to “Network” and note down your “IP Address” and “Gateway”.
Step 5: Now get back to “Network”.
Step 6: Choose your Wi-Fi network and press the “Menu Button” on your FireStick remote.
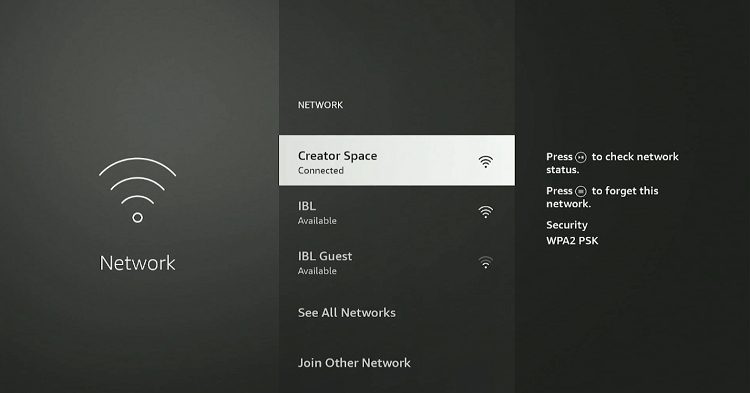
Step 7: Press the “Select” button to forget the network.
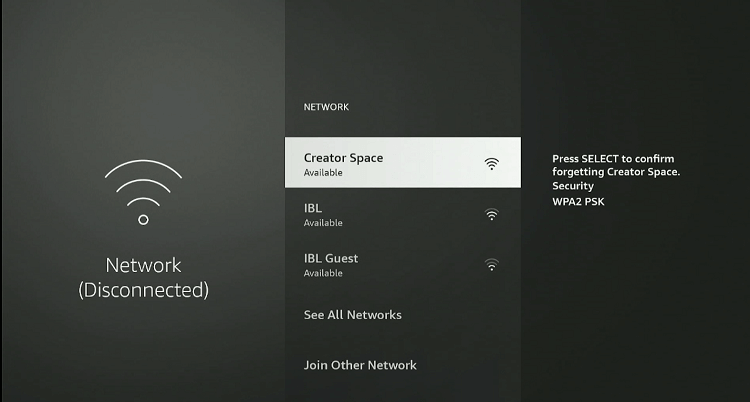
Step 8: Now choose your Wi-Fi network and enter your password.
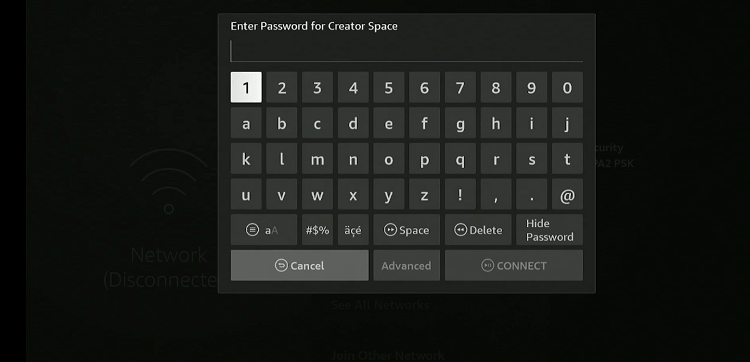
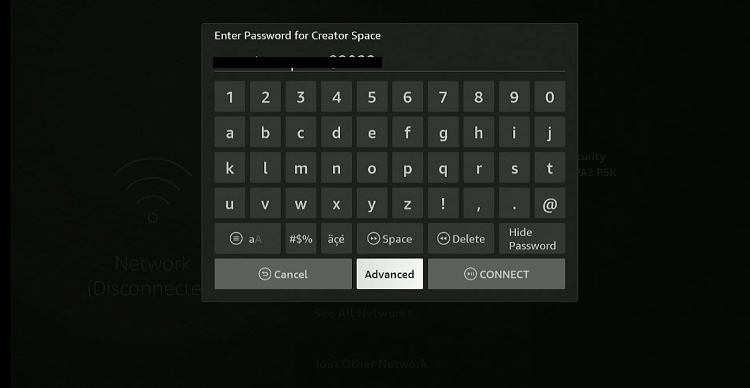
Step 9: Click “Advanced”.
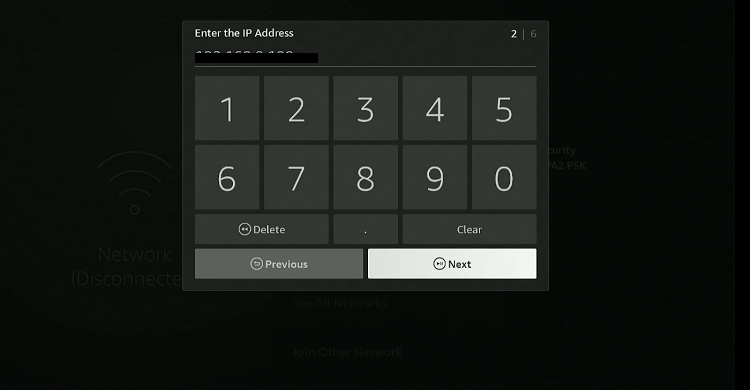
Step 10: Enter the IP address you noted down previously and click “Next”.
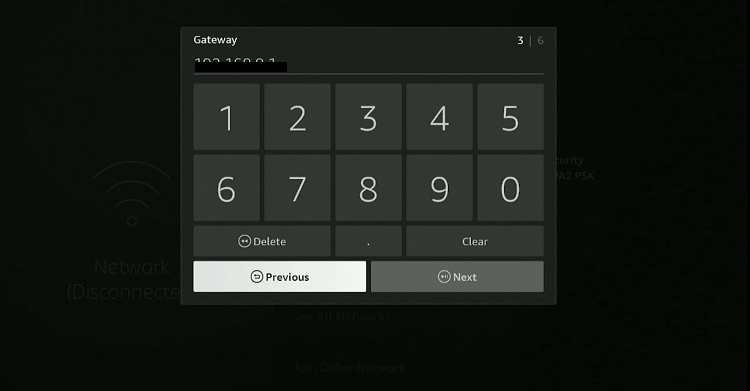
Step 11: Enter Gateway values and click “Next”.
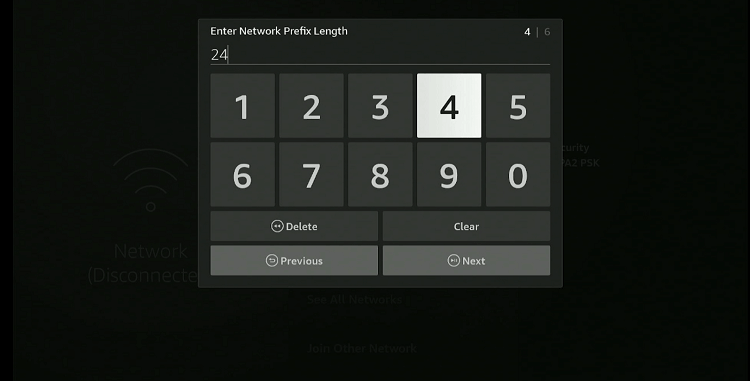
Step 12: You will need to enter the Network Prefix length; type 24 and select “Next.”
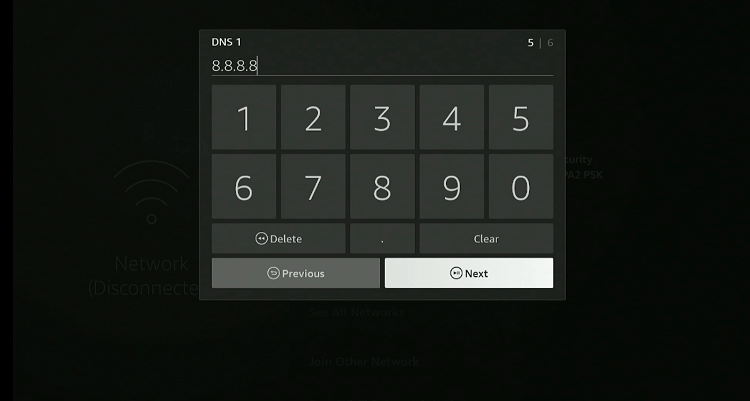
Step 13: Now, enter the DNS 1 setting. If you are using Cloudflare, type 1.1.1.1 and click “Next.” For Google DNS, you would enter 8.8.8.8.
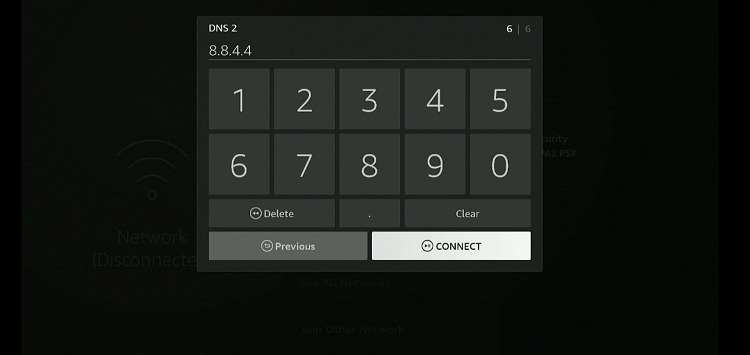
Step 14: Enter the DNS 2 setting. For Cloudflare, enter 1.0.0.1 and click “Connect.” For Google DNS, use 8.8.4.4. The DNS setting has been changed successfully!
Step 15: To verify the DNS setting, choose “My Fire TV”.
Step 16: Navigate to “About”.
Step 17: Scroll down to “Network” and look right to see which DNS address your device is using!
FAQs – DNS
Why should I change my DNS on Firestick?
Changing your DNS can improve internet speed, increase security, and bypass regional restrictions.
Is it safe to change the DNS settings on my Firestick?
Yes, it is safe, especially if you use reputable DNS services like Google DNS or Cloudflare.
Does changing the DNS on FireStick cost money?
Changing to a public DNS is free, but some premium DNS services may charge a fee.
How does DNS work?
DNS translates human-readable domain names into machine-readable IP addresses, enabling browsers to load internet resources.